Getting I2P
Installation
In the terminal:
sudo apt-add-repository ppa:i2p-maintainers/i2p && sudo apt-get update
This will add the official I2P repositories and refresh your package list. Then:
sudo apt-get install i2p
will install I2P and all dependencies.
Create a new Firefox profile
Open the Run dialog by tapping Alt+F2 and typing
firefox –no-remote -P
Go to Create Profile
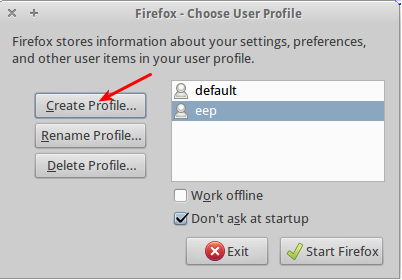
Give your profile a name, “eep” my case, and finish the wizard to launch your new profile.
Setting up Firefox
Open the Preferences window and go to the network settings:
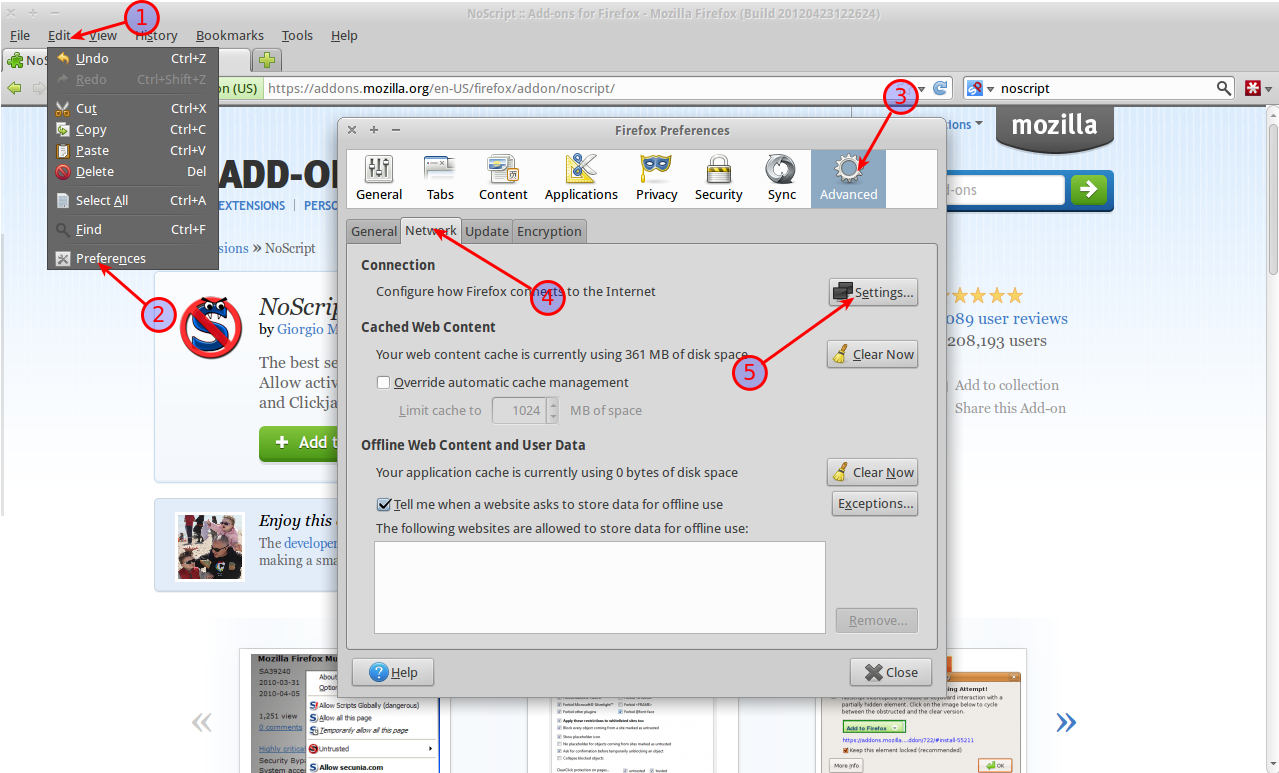
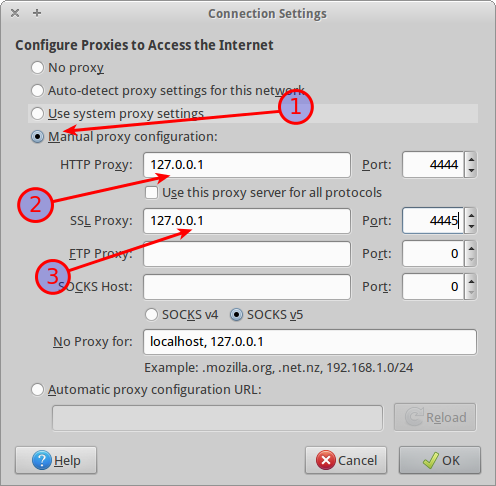
Set proxies to Manual (1), input the web proxies for I2P (2 and 3), and click OK.
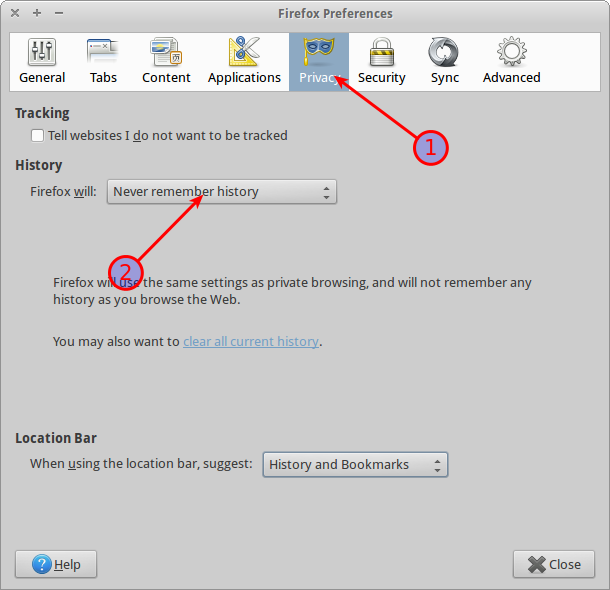
Securing Firefox
Plugins such as Flash, Java, and Javascript can be used to identify you, so make sure you turn them off by installing the NoScript addon.
Also, make sure your browser doesn’t remember anything you do. The safest way is to enable “Always Private Browsing” mode:
Browsing I2P
Your I2P installation should be ready to use. Go to your router console at http://127.0.0.1:7657 to find a list of links to visit. I recommend setting the router console as your home page for easy reference.
